Programmatically handle long running tasks in Apps Script
An approach to process hundreds of thousands of rows of data (say, on Google Sheets) without running into the script execution timeout error.

TL;DR — the typical challenge we face with tasks that take longer to execute is that of running into the execution timeout error (that's at 6 minutes — Script runtime — as of 10-Feb-2023) and this article merely elaborates on how to bypass script execution timeout *with a detailed example*.
Prerequisite
You must already have a starter function that works for a relatively smaller set of rows, that you wish to scale to 100s if not 1000s or even 10s-of-1000s of rows.
If you want to follow along, you can make a copy of this spreadsheet and replace the Apps Script code as below —
function getDomainInfo() {
  const ss = SpreadsheetApp.getActiveSpreadsheet().getActiveSheet();
  const [header, ...values] = ss.getDataRange().getValues();
  const domainIndex = header.indexOf("domain");
  const registrarIndex = header.indexOf("registrar");
  const totalValues = values.length;
  for (let i = 0; i < totalValues; i++) {
    const row = values[i];
    const name = row[domainIndex];
    const url = `https://rdap.verisign.com/com/v1/domain/${name}`;
    const response = UrlFetchApp.fetch(url, { muteHttpExceptions: true });
    if (response.getResponseCode() === 200) {
      const rowData = [];
      const data = JSON.parse(response.getContentText());
      const registrar = data.entities[0].vcardArray[1][1][3];
      const createdDate = data.events[0].eventDate.replace("T", " ").replace("Z", "");
      const expiryDate = data.events[1].eventDate.replace("T", " ").replace("Z", "");
      rowData.push([registrar, createdDate, expiryDate]);
      ss.getRange((i + 1) + 1, registrarIndex + 1, 1, 3).setValues(rowData);
      SpreadsheetApp.flush();
    }
  }
}
Approach
Step 1
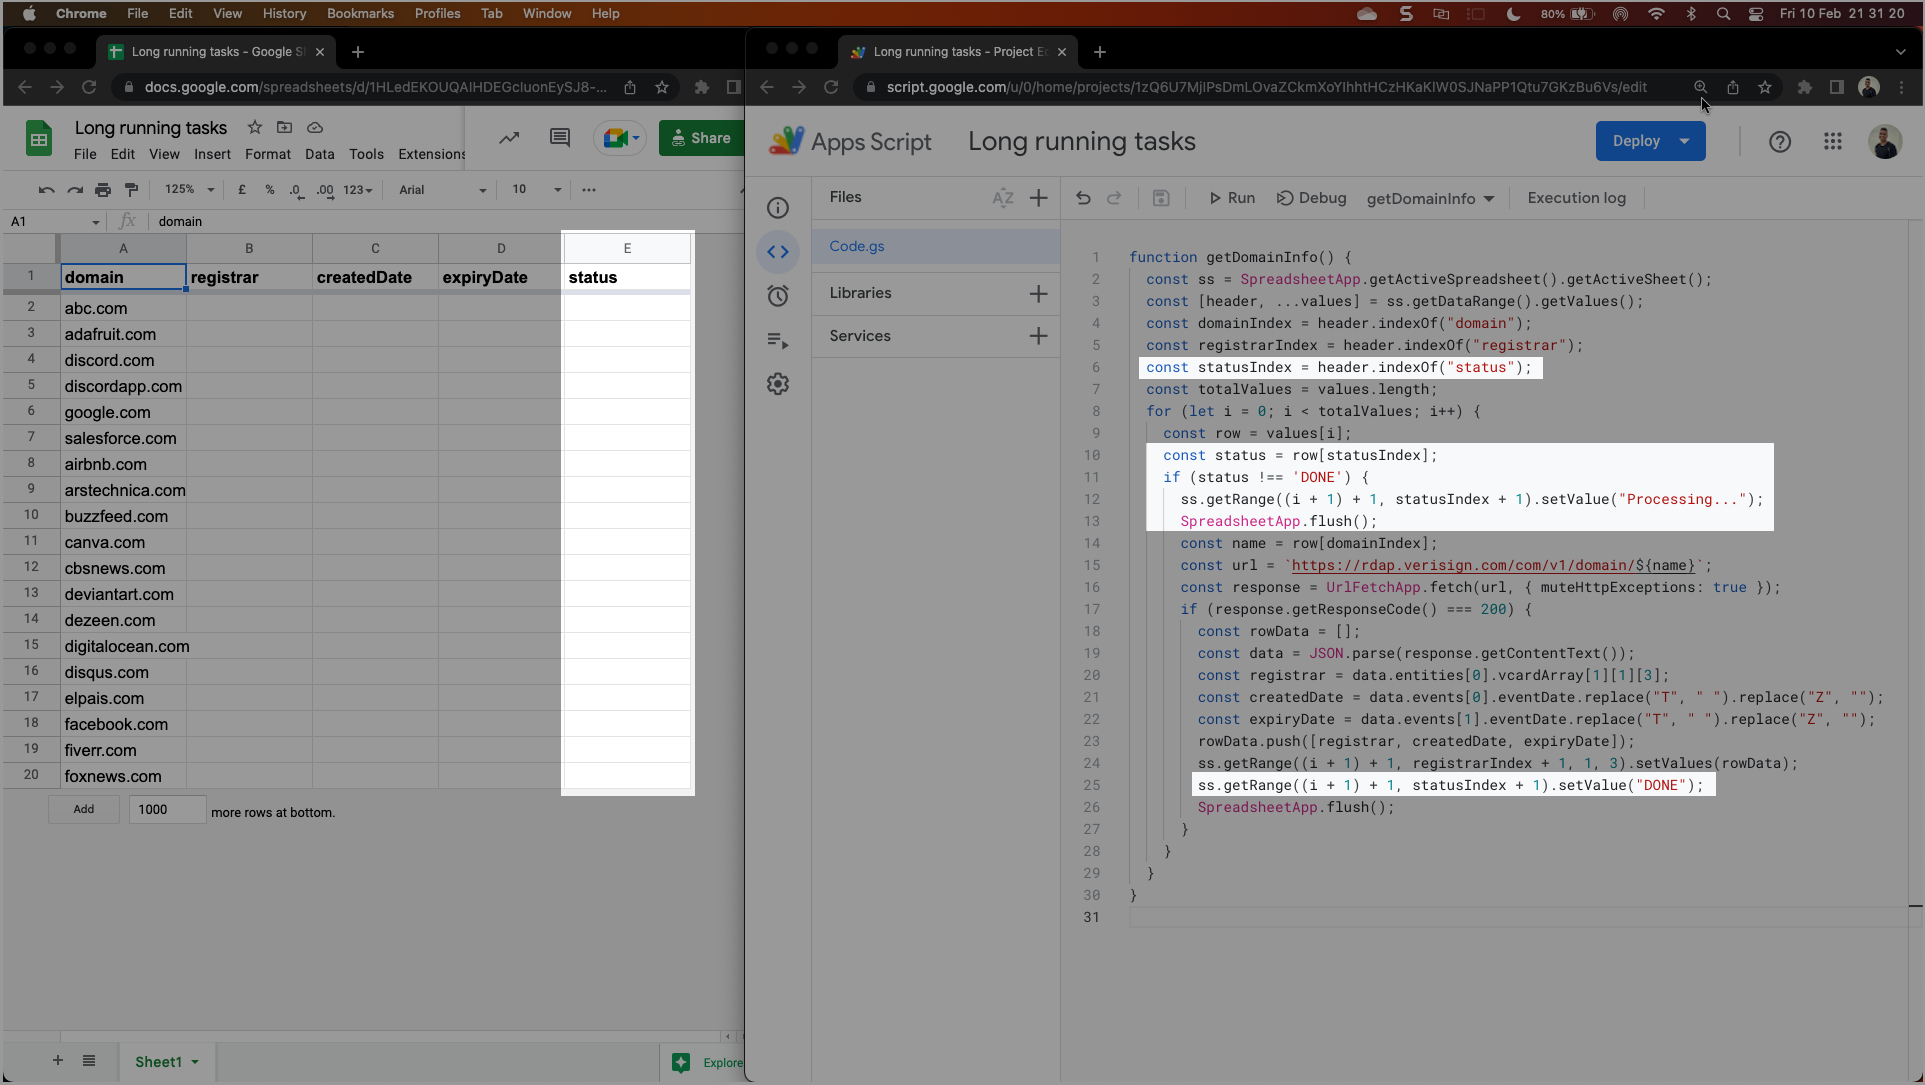
- Task: Let's start by adding a status column on the spreadsheet and also modify the script code to update status whenever it starts & ends processing each of the rows
- Explanation: This will allow us to monitor and track which rows have already been processed and should the script run again, it could automatically detect the row from which it needs to start (as opposed to re-doing everything from the beginning)
- Modification preview —

- Code snippet —
function getDomainInfo() {
  const ss = SpreadsheetApp.getActiveSpreadsheet().getActiveSheet();
  const [header, ...values] = ss.getDataRange().getValues();
  const domainIndex = header.indexOf("domain");
  const registrarIndex = header.indexOf("registrar");
  const statusIndex = header.indexOf("status");
  const totalValues = values.length;
  for (let i = 0; i < totalValues; i++) {
    const row = values[i];
    const status = row[statusIndex];
    if (status !== 'DONE') {
      ss.getRange((i + 1) + 1, statusIndex + 1).setValue("Processing...");
      SpreadsheetApp.flush();
      const name = row[domainIndex];
      const url = `https://rdap.verisign.com/com/v1/domain/${name}`;
      const response = UrlFetchApp.fetch(url, { muteHttpExceptions: true });
      if (response.getResponseCode() === 200) {
        const rowData = [];
        const data = JSON.parse(response.getContentText());
        const registrar = data.entities[0].vcardArray[1][1][3];
        const createdDate = data.events[0].eventDate.replace("T", " ").replace("Z", "");
        const expiryDate = data.events[1].eventDate.replace("T", " ").replace("Z", "");
        rowData.push([registrar, createdDate, expiryDate]);
        ss.getRange((i + 1) + 1, registrarIndex + 1, 1, 3).setValues(rowData);
        ss.getRange((i + 1) + 1, statusIndex + 1).setValue("DONE");
        SpreadsheetApp.flush();
      }
    }
  }
}- Workflow overview —
Step 2
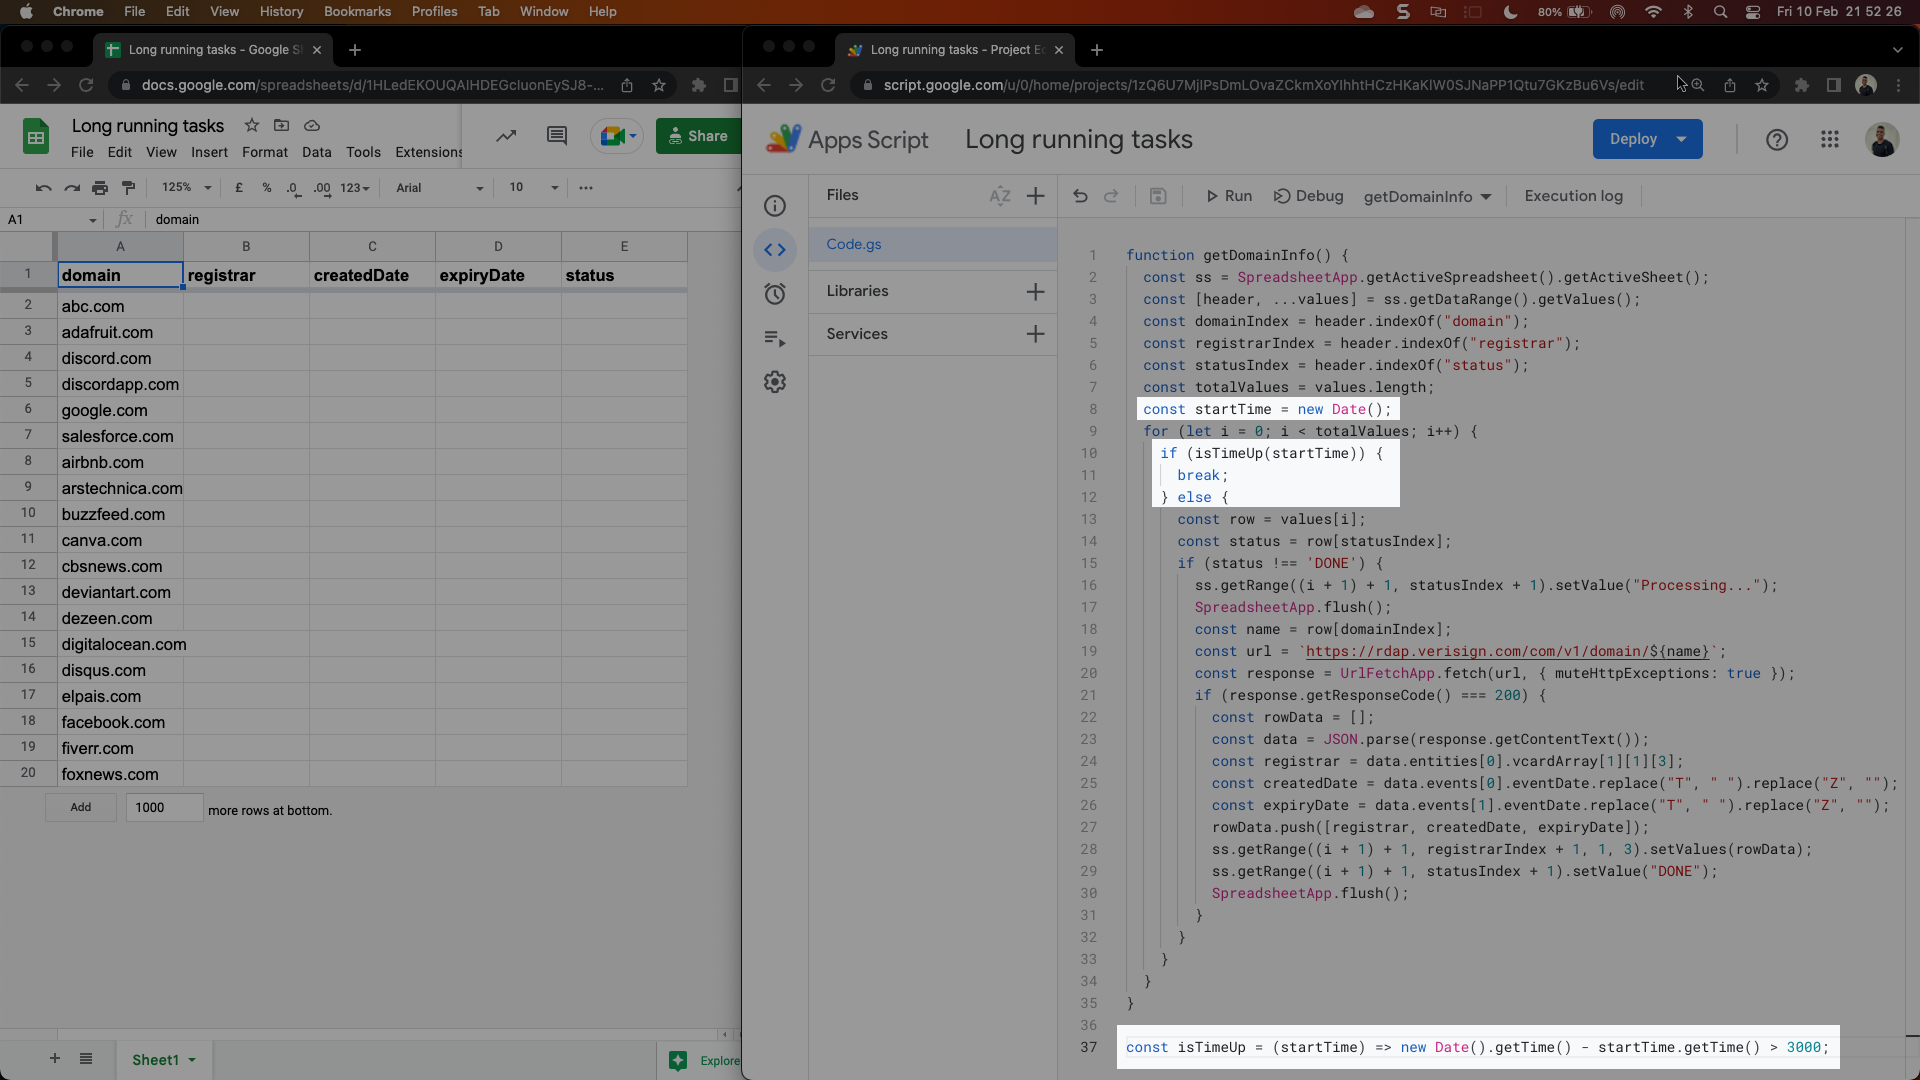
- Task: Create a new function —
isTimeUp— and modify the script to check if we have enough time to run through another loop and get data for the next row. - Explanation: This would allow us to set a custom timeout of our own and that would avoid the script to stop abruptly by not allowing it to hit its default runtime limit.
- Modification preview —

- Code snippet —
function getDomainInfo() {
  const ss = SpreadsheetApp.getActiveSpreadsheet().getActiveSheet();
  const [header, ...values] = ss.getDataRange().getValues();
  const domainIndex = header.indexOf("domain");
  const registrarIndex = header.indexOf("registrar");
  const statusIndex = header.indexOf("status");
  const totalValues = values.length;
  const startTime = new Date();
  for (let i = 0; i < totalValues; i++) {
    if (isTimeUp(startTime)) {
      break;
    } else {
      const row = values[i];
      const status = row[statusIndex];
      if (status !== 'DONE') {
        ss.getRange((i + 1) + 1, statusIndex + 1).setValue("Processing...");
        SpreadsheetApp.flush();
        const name = row[domainIndex];
        const url = `https://rdap.verisign.com/com/v1/domain/${name}`;
        const response = UrlFetchApp.fetch(url, { muteHttpExceptions: true });
        if (response.getResponseCode() === 200) {
          const rowData = [];
          const data = JSON.parse(response.getContentText());
          const registrar = data.entities[0].vcardArray[1][1][3];
          const createdDate = data.events[0].eventDate.replace("T", " ").replace("Z", "");
          const expiryDate = data.events[1].eventDate.replace("T", " ").replace("Z", "");
          rowData.push([registrar, createdDate, expiryDate]);
          ss.getRange((i + 1) + 1, registrarIndex + 1, 1, 3).setValues(rowData);
          ss.getRange((i + 1) + 1, statusIndex + 1).setValue("DONE");
          SpreadsheetApp.flush();
        }
      }
    }
  }
}

const isTimeUp = (startTime) => new Date().getTime() - startTime.getTime() > 3000;- Workflow overview —
Step 3
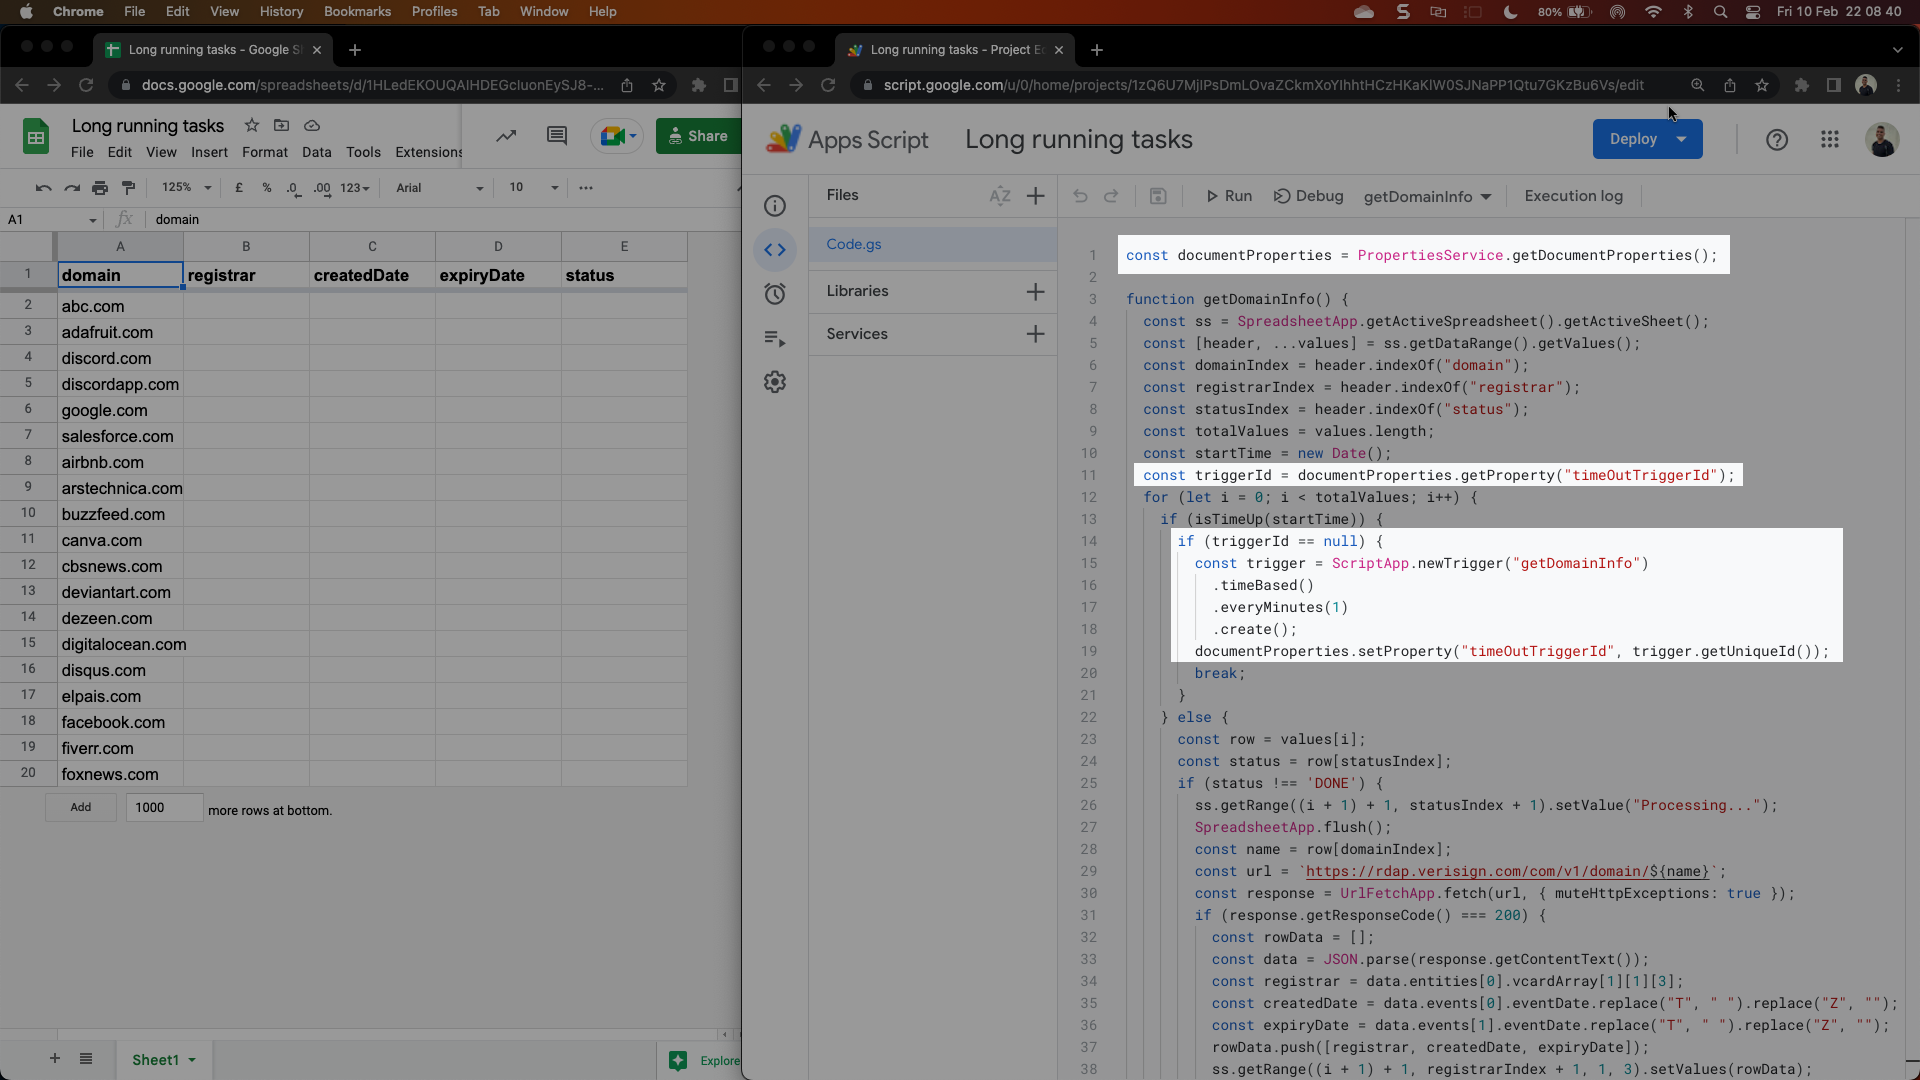
- Task: Set-up a time-based trigger that would run at a specific frequency
- Explanation: In cases where the script exceeds the custom timeout limit, this would allow the script to re-run itself after a certain duration (in this case, every 1 minute) and that would seamlessly allow the next set of rows to be processed automatically
- Modification preview —

- Code snippet —
const documentProperties = PropertiesService.getDocumentProperties();

function getDomainInfo() {
  const ss = SpreadsheetApp.getActiveSpreadsheet().getActiveSheet();
  const [header, ...values] = ss.getDataRange().getValues();
  const domainIndex = header.indexOf("domain");
  const registrarIndex = header.indexOf("registrar");
  const statusIndex = header.indexOf("status");
  const totalValues = values.length;
  const startTime = new Date();
  const triggerId = documentProperties.getProperty("timeOutTriggerId");
  for (let i = 0; i < totalValues; i++) {
    if (isTimeUp(startTime)) {
      if (triggerId == null) {
        const trigger = ScriptApp.newTrigger("getDomainInfo")
          .timeBased()
          .everyMinutes(1)
          .create();
        documentProperties.setProperty("timeOutTriggerId", trigger.getUniqueId());
        break;
      }
    } else {
      const row = values[i];
      const status = row[statusIndex];
      if (status !== 'DONE') {
        ss.getRange((i + 1) + 1, statusIndex + 1).setValue("Processing...");
        SpreadsheetApp.flush();
        const name = row[domainIndex];
        const url = `https://rdap.verisign.com/com/v1/domain/${name}`;
        const response = UrlFetchApp.fetch(url, { muteHttpExceptions: true });
        if (response.getResponseCode() === 200) {
          const rowData = [];
          const data = JSON.parse(response.getContentText());
          const registrar = data.entities[0].vcardArray[1][1][3];
          const createdDate = data.events[0].eventDate.replace("T", " ").replace("Z", "");
          const expiryDate = data.events[1].eventDate.replace("T", " ").replace("Z", "");
          rowData.push([registrar, createdDate, expiryDate]);
          ss.getRange((i + 1) + 1, registrarIndex + 1, 1, 3).setValues(rowData);
          ss.getRange((i + 1) + 1, statusIndex + 1).setValue("DONE");
          SpreadsheetApp.flush();
        }
      }
    }
  }
}

const isTimeUp = (startTime) => new Date().getTime() - startTime.getTime() > 3000;Note: We're also making use of a property store (in this case, getDocumentProperties as that would allow us to store the trigger once it has already been created after the first run (thus ensuring we don't create a new trigger every time the script runs) and because it would come in handy during the next/final step of our workflow.
Step 4
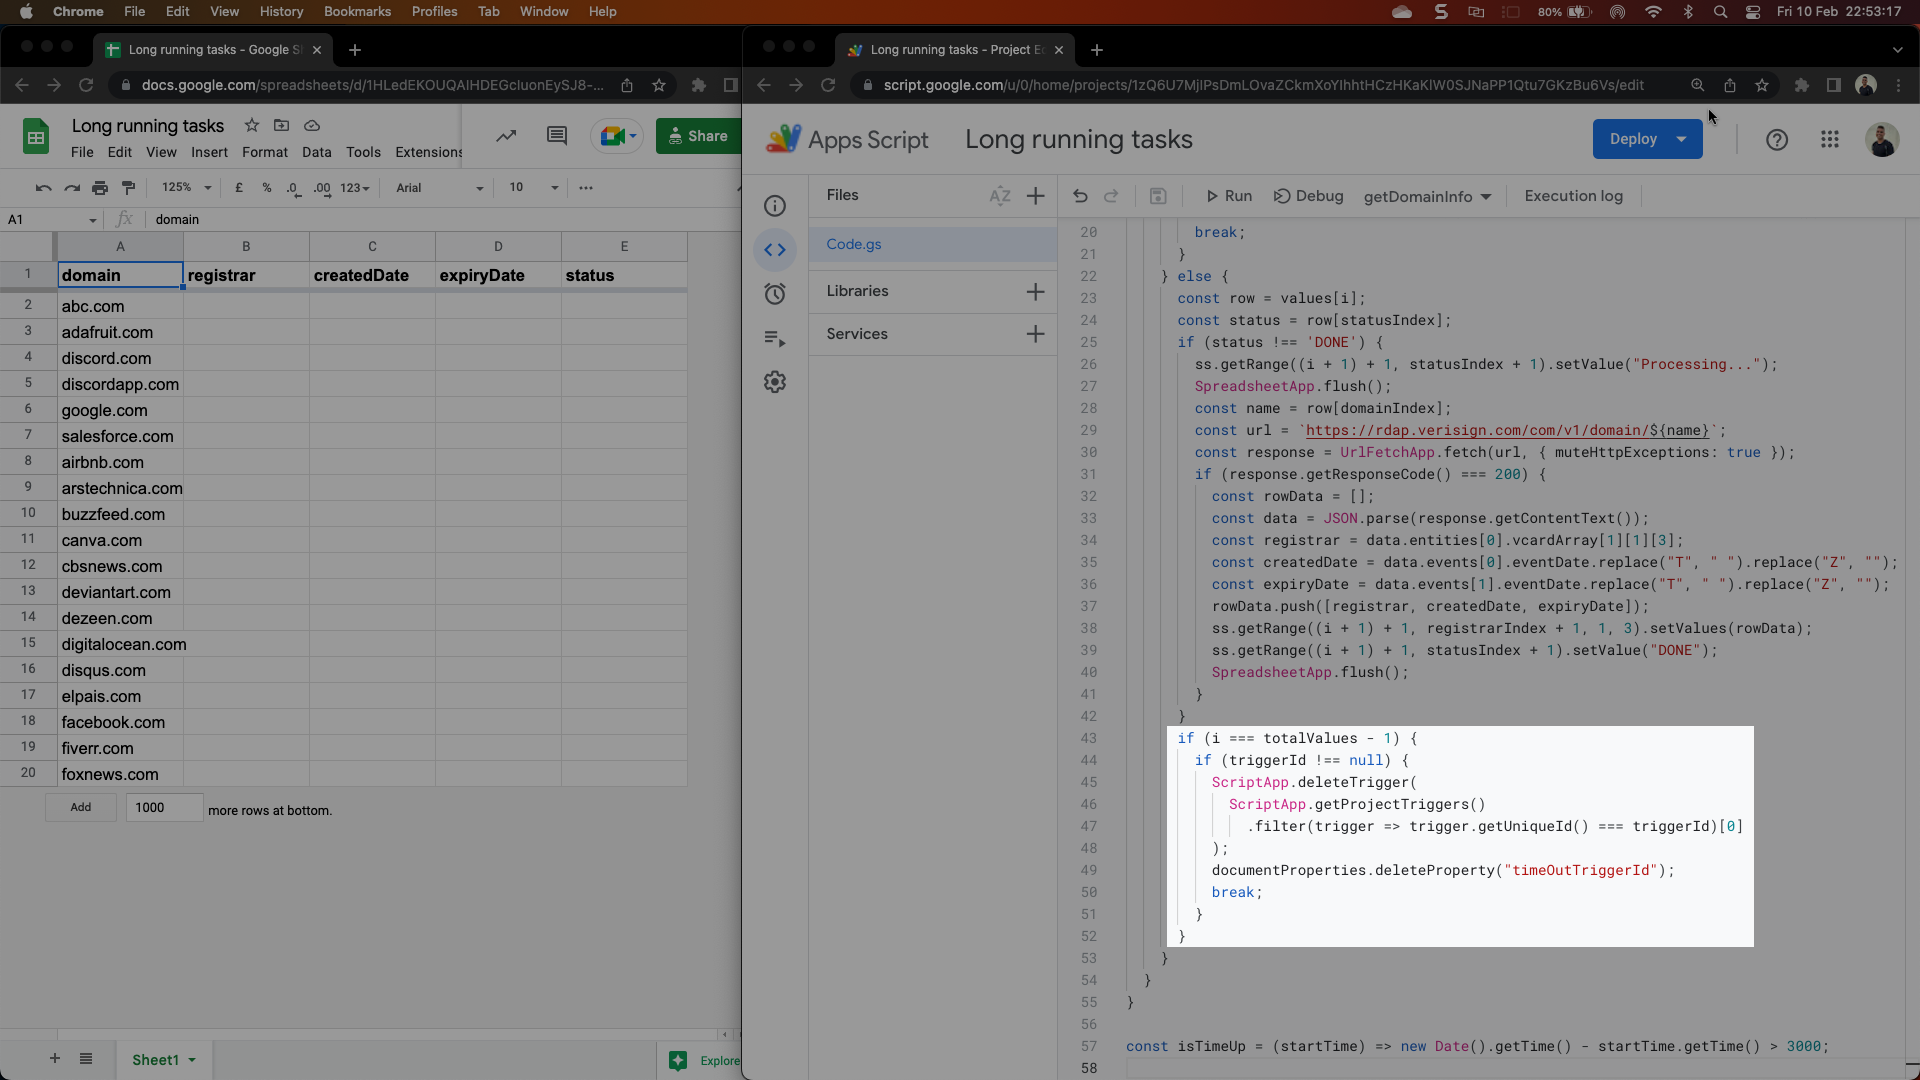
- Task: Delete the time-based trigger created as part of Step 3.
- Explanation: While this is an optional step, it is highly recommended NOT to be skipped because if unchecked, the time-based trigger would run indefinitely (even if it may have no rows to process), making the script and the document too resource intensive.
- Modification preview —

- Code snippet —
const documentProperties = PropertiesService.getDocumentProperties();

function getDomainInfo() {
  const ss = SpreadsheetApp.getActiveSpreadsheet().getActiveSheet();
  const [header, ...values] = ss.getDataRange().getValues();
  const domainIndex = header.indexOf("domain");
  const registrarIndex = header.indexOf("registrar");
  const statusIndex = header.indexOf("status");
  const totalValues = values.length;
  const startTime = new Date();
  const triggerId = documentProperties.getProperty("timeOutTriggerId");
  for (let i = 0; i < totalValues; i++) {
    if (isTimeUp(startTime)) {
      if (triggerId == null) {
        const trigger = ScriptApp.newTrigger("getDomainInfo")
          .timeBased()
          .everyMinutes(1)
          .create();
        documentProperties.setProperty("timeOutTriggerId", trigger.getUniqueId());
        break;
      }
    } else {
      const row = values[i];
      const status = row[statusIndex];
      if (status !== 'DONE') {
        ss.getRange((i + 1) + 1, statusIndex + 1).setValue("Processing...");
        SpreadsheetApp.flush();
        const name = row[domainIndex];
        const url = `https://rdap.verisign.com/com/v1/domain/${name}`;
        const response = UrlFetchApp.fetch(url, { muteHttpExceptions: true });
        if (response.getResponseCode() === 200) {
          const rowData = [];
          const data = JSON.parse(response.getContentText());
          const registrar = data.entities[0].vcardArray[1][1][3];
          const createdDate = data.events[0].eventDate.replace("T", " ").replace("Z", "");
          const expiryDate = data.events[1].eventDate.replace("T", " ").replace("Z", "");
          rowData.push([registrar, createdDate, expiryDate]);
          ss.getRange((i + 1) + 1, registrarIndex + 1, 1, 3).setValues(rowData);
          ss.getRange((i + 1) + 1, statusIndex + 1).setValue("DONE");
          SpreadsheetApp.flush();
        }
      }
      if (i === totalValues - 1) {
        if (triggerId !== null) {
          ScriptApp.deleteTrigger(
            ScriptApp.getProjectTriggers()
              .filter(trigger => trigger.getUniqueId() === triggerId)[0]
          );
          documentProperties.deleteProperty("timeOutTriggerId");
          break;
        }
      }
    }
  }
}

const isTimeUp = (startTime) => new Date().getTime() - startTime.getTime() > 3000;
Summary
- Step 0: Create your workflow for a smaller dataset that would fit within the script runtime
- Step 1: Add a status column to monitor & track the number of rows being processed and the ones to skip during subsequent runs
- Step 2: Add a new function to set a custom timeout and check if we have enough time before processing the next set of data/row
- Step 3: Create a time-based trigger to re-run the function after first-run automatically
- Step 4: Delete the time-based trigger (created in the previous step) once all the data has been processed
